You have been warned.
Now, as I mentioned in my previous post, I am in the process of adding a small LCD screen to the existing arduino circuit for my smart home project. And I ran into some problems. Solving them taught me something I want to share.
But first, let me illustrate the problem. The LCD I am using is a Nokia 5110 LCD breakout. Since it operates on 3.3V, wiring it to a 5V arduino is not trivial. You need logic level converters (or plenty of voltage dividers).
Actually, I did connect it directly to 5V the first time, by mistake. It didn't blow up, it worked. But they say it is not recommended to use it that way.
The "prototype" (for testing the LCD) was a fine mess of jumper wires:
It looks too ugly even for me, but the real problem is that I have to fit it in here:
So I came up with this:
 |
| (back side) |
 |
| (front side) |
Which connects the LCD to an arduino like this:
Now you just slap it on the breadboard and all you need is 2 jumper wires to connect it. I counted 24 in the first picture.
Basically, it is a "breakout for the breakout". The LCD came with a breakout board when I bought it (the red PCB). But it still worked at 3.3V. So I made a breakout which wires the LCD breakout through the logic level converter to the "interface" pins.
I cheated a bit, because in the original schematic I used two logic level converters and in my breakout board I use only one. This is because there are 5 signals to convert from 5V to 3.3V and the level converters have 4 IOs. So, out of pure laziness, I wired the reset pin with an inline 10K resistor instead through a level converter like the other 4 data pins. It is OK in this particular case. If it wasn't, I'd simply add another converter like on the first breadboard (and use only one of its 4 IOs).
So far nothing special, it was just what I planned to do.
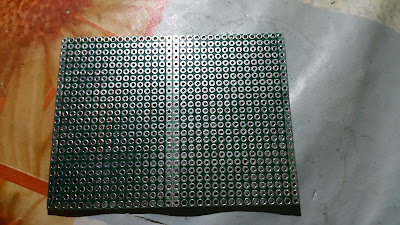
Except that this time I used a classic proto-board like this:
Until now, I've always used strip-board like protoboards like this:
The classic ones are much more tedious to work with, because you don't have pre-made connections.
You have to make them yourself, usually by bending component leads and sometimes using 3-way or even 4-way solder joints. It is much slower and requires a lot of patience. I had to take a break twice, to cool down my nerves :)
But these boards allow for much more flexibility, and ultimately space savings, which I needed in this case.
Of course, real men don't use protoboards - they etch their own PCBs. And they use SMD components. Some day, when I grow up, I might learn how to do that too :)
Anyway, that was the minor lesson learned - how to solder on a classic protoboard. I really don't want to do it again.
The real "invention" (and the reason I dedicate a separate post to this) came later. Well, I am pretty sure it has been "invented" many years ago, but being the noob I am in electronics, I had to invent it for myself. What am I talking about? Look at this picture again:
Pay attention to the pins at the bottom. Did you get it already? :)
For those of you who didn't here it is:
Normally, breakout boards have their pins next to each other, in one or more rows. And that is exactly what I would do, if I had enough space on the breadboard where I need to put the component, without even thinking. Then I would use jumper wires (9 in this case) to connect the pins on the arduino to the corresponding pins on the breakout, That's what we all have done so many times with manufactured components, that we don't even think about it.
But, by spacing the "interface" pins properly, I can now just put the component on the breadboard directly under the arduino, so the corresponding pins get connected by the breadbord's premade connections. I only need 2 jumper wires to connect the orange and red wire (3.3V and 5V) to the other side of the arduino. The same would apply if I decide to solder this into a stripboard some day.
I guess this "technique" has something in common with what arduino shields do.
It is a very simple idea, but I haven't thought about it before. And it looks so obvious now :)
And I can think of so many cases where using this technique will come in handy.
This is probably just a basic and well known knowledge for people with good experience in electronics.
But reinventing the wheel, as pointless as it is, feels so damn good and rewarding!
Cheers!


No comments:
Post a Comment